Obtain the installer for the version that you want to install:
-
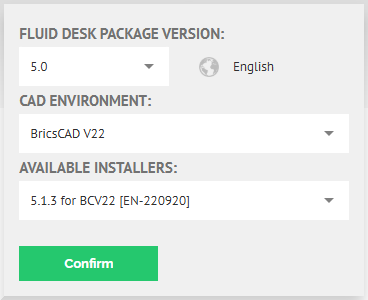
This is usually done from the FLUID DESK website, www.fluid-desk.com; You will have to select Your preferred Language, CAD environment (AutoCAD, BricsCAD or FLUID DESK BIM) and its version; the available installer(s) will be listed, with the latest one automatically selected. You will have to register your e-mail address before being able to proceed with the download.
Before opening the downloaded package, You should already have your CAD system (AutoCAD or BricsCAD) installed, configured and running. This does not apply to the FLUID DESK BIM platform, which itself is included in the package that You have downloaded from our website.
-
From a direct link; here are some examples of installers that have been published:
FDBIM 2024 / 6.0.4 [2024.08.30] (last version of FLUID DESK BIM 2024)
FDBIM 2025 / 6.0.8 [2025.08.18] (current version of FLUID DESK BIM 2025)
Run the installer:
-
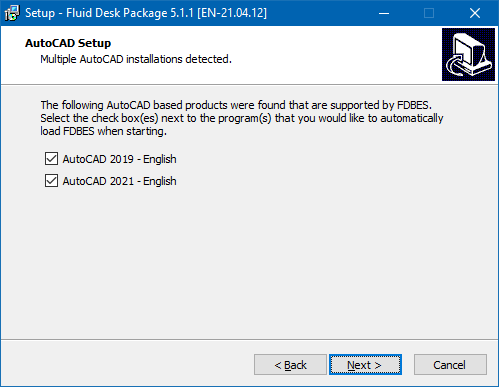
For packages supporting AutoCAD, You will be prompted to select which version(s) of AutoCAD You want to install our program for. Because different AutoCAD versions require different program binaries, You will not be able to install the program for incompatible editions at the same time. You can, however, install the program one or more times, as long as you do so in separate directories!
|
AutoCAD 2015 / 2016 |
|
AutoCAD 2017 |
|
AutoCAD 2018 |
|
AutoCAD 2019 / 2020 |
|
AutoCAD 2021 / 2022 / 2023 / 2024 |
|
AutoCAD 2025 |
-
For BricsCAD, each platform version (and language) will come with the corresponding installer.
Running the program:
Once installation has successfully completed, You simply have to run Your CAD system; our modules (and menus) will load automatically. If for any reason this is not the case, You still have the option to configure Manual Loading by selecting Tools \ Load Application… from the Menu Bar or by typing the command _APPLOAD on the Command Line.
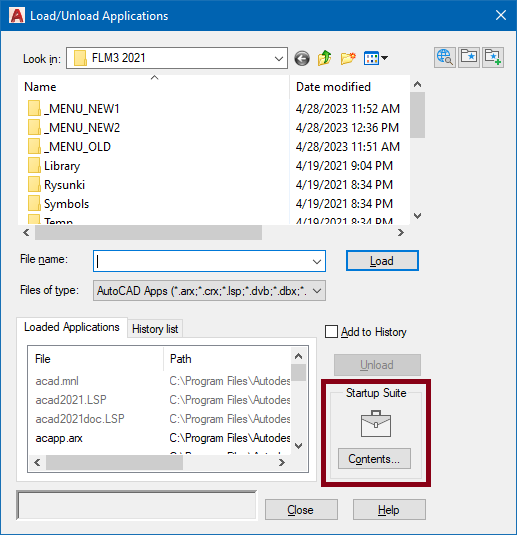
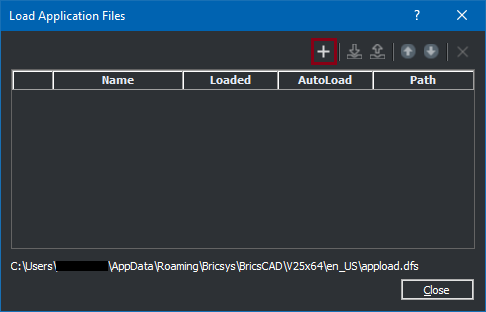
To make sure that our software is always loaded on startup, You must add all installed modules in the window above. For AutoCAD, you have to add them to the “Startup Suite” option, while for BricsCAD, You simply have to add each one to the list using the “+” button and then check the corresponding “AutoLoad” option. Note that the location of these files will depend on the selected CAD environment and installation directory; as for the file extensions, .arx is for AutoCAD, .brx is for BricsCAD and .frx is used by FLUID DESK BIM. You should add the following modules, in this order:
-
C:\Program Files\FDBES\FLM3\FLM3Loader.arx / .brx / .frx
FLM 3.0 (FLM_ABOUT) -
C:\Program Files\FDBES\FLM3\Vnp5Loader.arx / .brx / .frx
Ventpack 5.0 / 6.0 (VNP_ABOUT) -
C:\Program Files\FDBES\FLM3\Hyp5Loader.arx / .brx / .frx
Hydronicpack 5.0 / 6.0 (HYP_ABOUT) -
C:\Program Files\FDBES\FLM3\Snp5Loader.arx / .brx / .frx
Sanipack 5.0 / 6.0 (SNP_ABOUT) -
C:\Program Files\FDBES\FLM3\Pe5Loader.arx / .brx / .frx
Project Explorer 5.0 / 6.0 (PE_ABOUT) -
C:\Program Files\FDBES\FLM3\SLDLoader.arx / .brx / .frx
SLD 5.0 (SLD_ABOUT); this module is no longer supported!
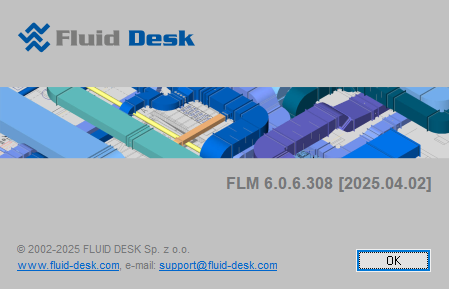
Once the program is installed and properly loaded, You should see the Toolbars, Menus and Ribbons automatically in your chosen CAD environment. If You don’t see those for any reason, please run the command FLM_MENU. If that still does not help, please see the next FAQ article, “Loading, Managing and Customizing Menus“. You can also double-check that the modules have successfully loaded by running the *_ABOUT commands as listed above; those should always display the “About” window for the corresponding application module, that usually looks something like this:
